Illustrative Detail about the Process to Recover Outlook Emails
For your need to recover MS Outlook emails, what we have for you here is a very useful Outlook mail recovery tool, which is Outlook Recovery software. To ease out the recovery process using this Outlook email recovery software, what we have for you here is the detailed, illustrative, & stepwise description of How to Open the PST File.
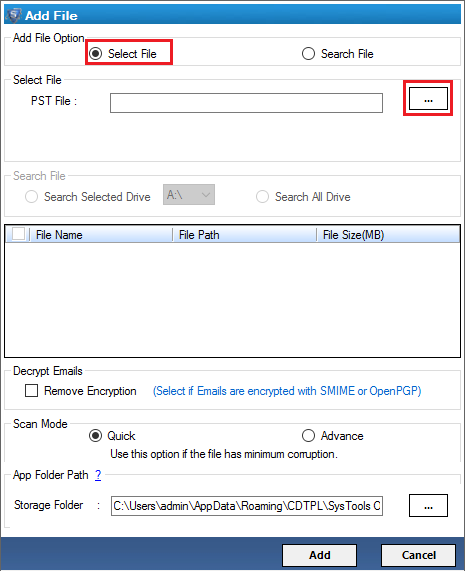
Step 1
Launch PST Recovery Software and Click on "Add File" button.

Step 2
The tool provides 2 option to add PST / BAK file(s). Select File and Search File
Hit on "Select file" and add PST File.
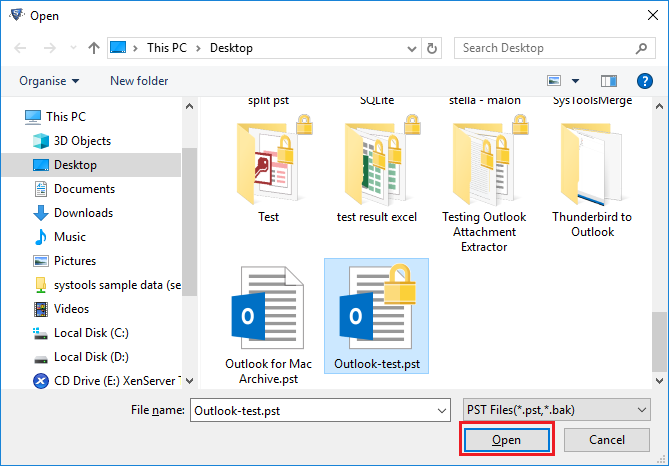
Step 3
Click on "Open" button to add PST file in the software.
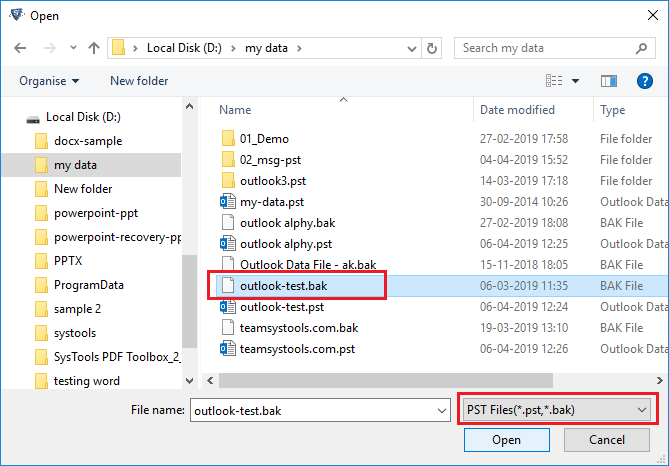
Click on "Open" button to add BAK file in the software.
Step 4
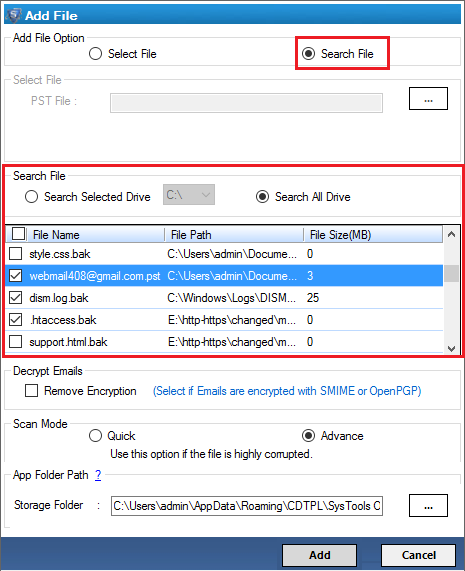
Or if you need to repair multiple PST files together or you are not knowing the proper location of your required PST/ BAK file, then choose Search File option.
It provides 2 options in it. Search Selected Drives and Search All Drives. The software will scan drives abd will display the PST/ BAK files as per your choice.
After hitting on Search file > Search all Drives > Search, you can see all the PST / BAK file.
Step 5
Check Remove Encryption option to decrypt Outlook Email messages with SMIME and OpenPGP encryption.
Click Here: Outlook Email Decryption
Step 6
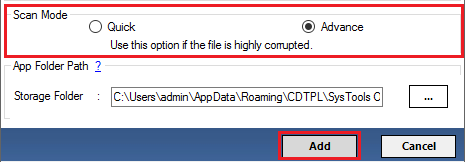
Now, perform Quick (for minor corruption) or Advance scan (for major corruption). Click on Add button at the bottom of the window.
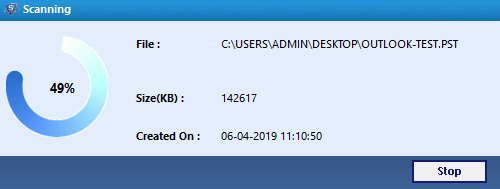
Step 7
Now the software Scanning procces will start.
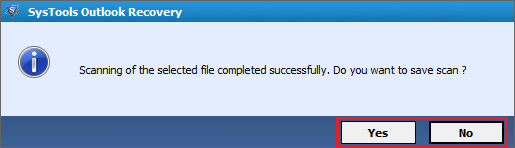
Save scanned Outlook PST file for later use. Saving it will avoid repeated scanning of same PST / BAK file (when you add same file later again) which is a time consuming process.
Step 8
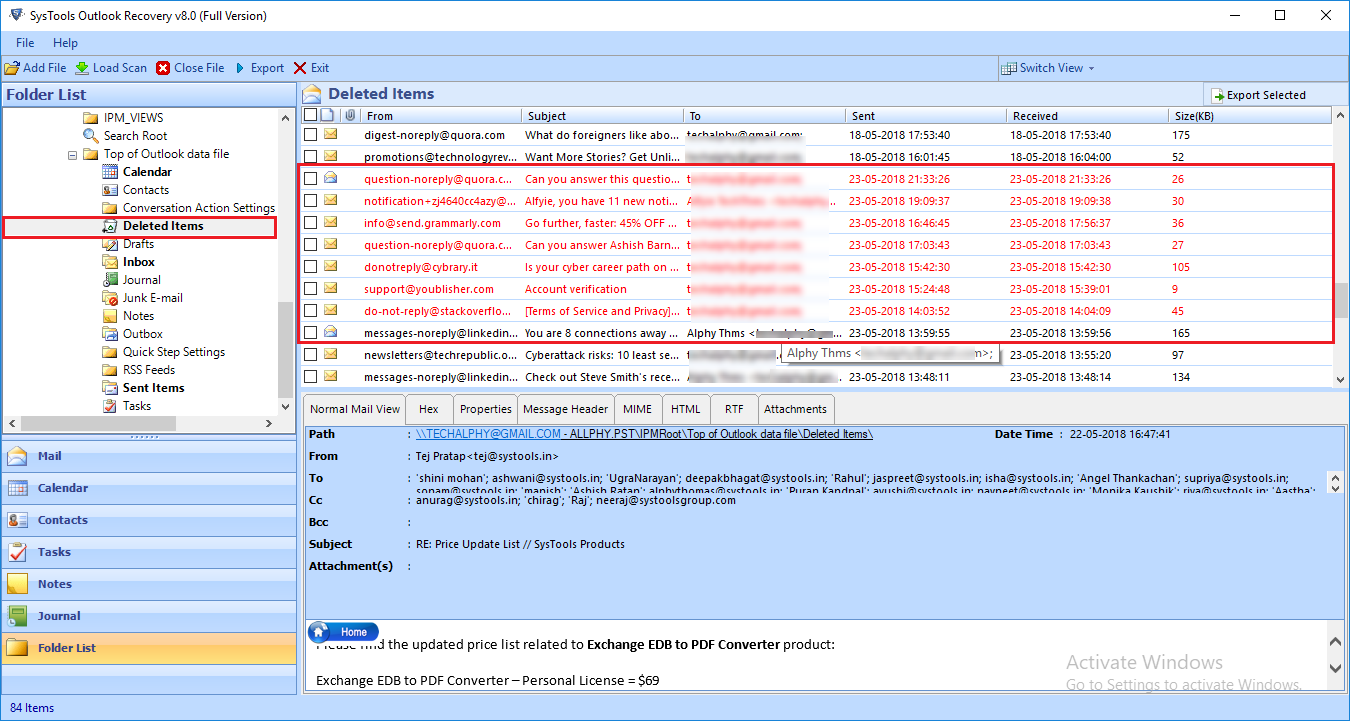
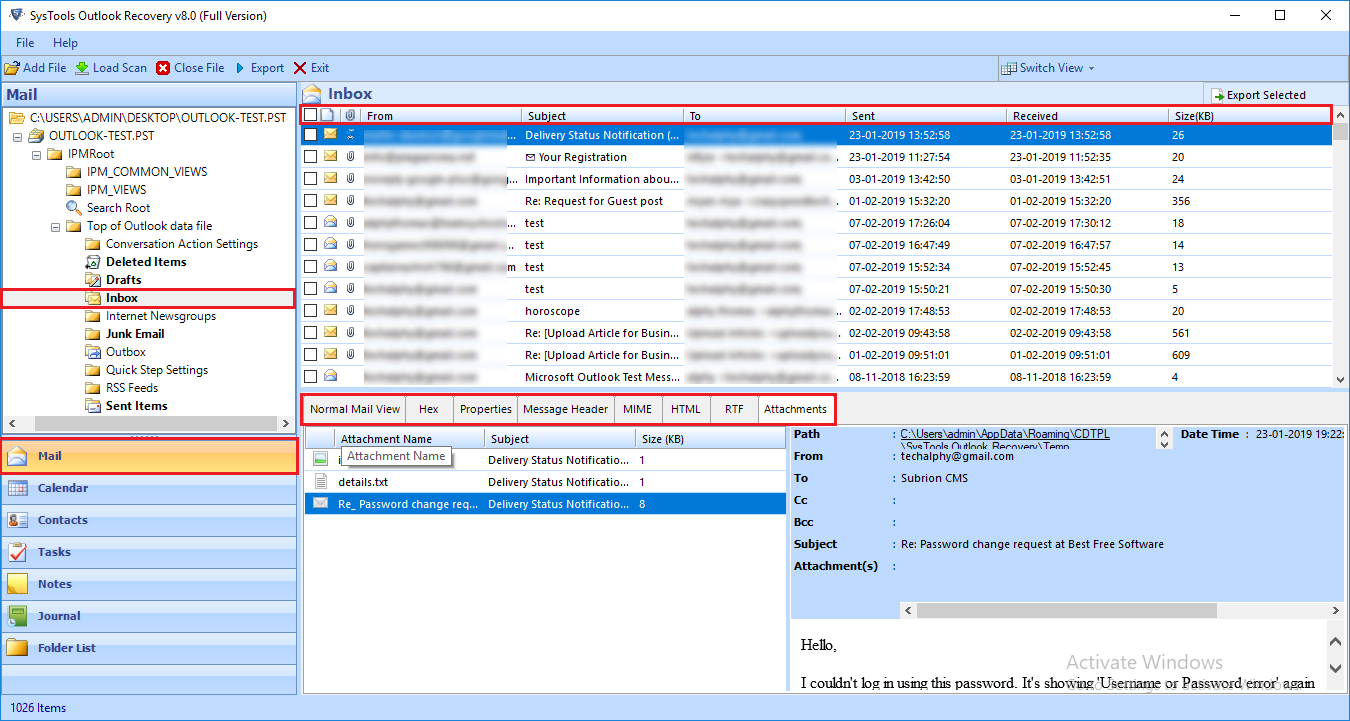
The entire data in Scanned PST / BAK file will be dispalyed in the software panel. The folders with data will dispalyed in BOLD Font. And it also provides previews of Outlook email items in 8 different format. They are: Normal Mail View, Hex, Properties, Message header, MIME, RTF, HTNML, and Email Attachments.
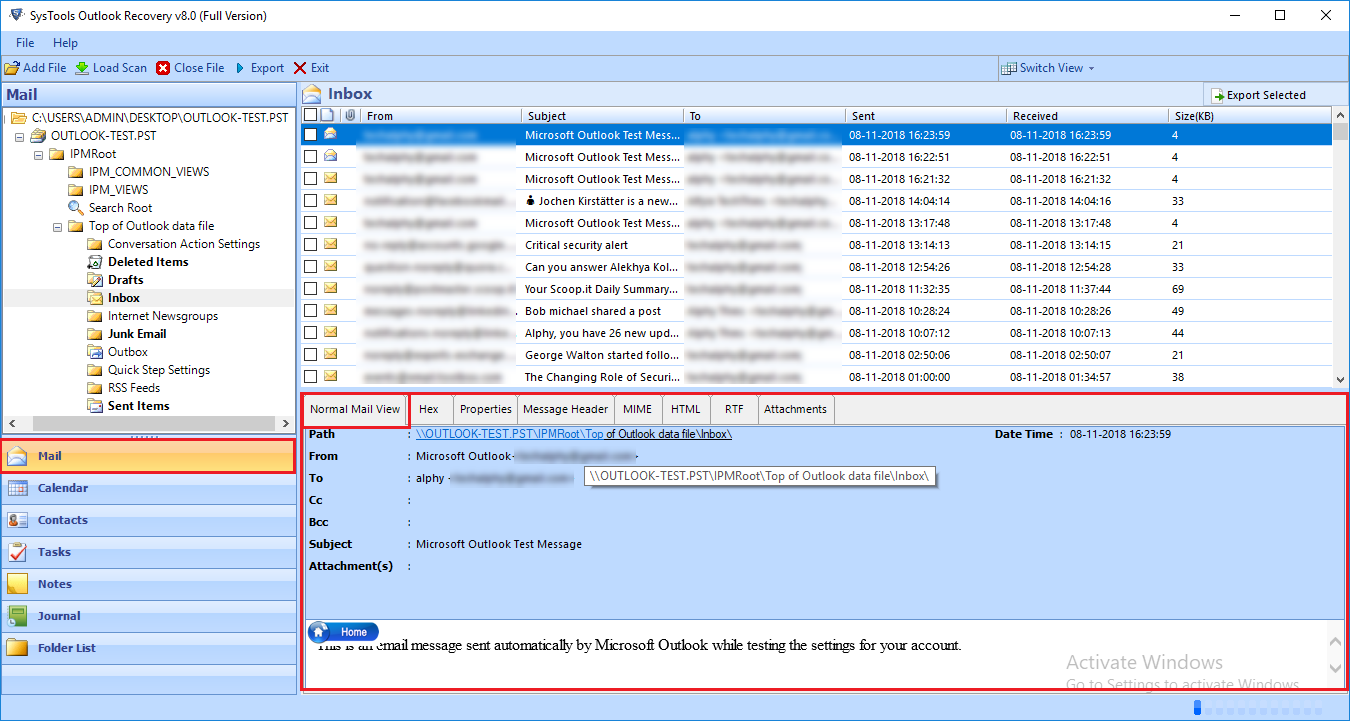
The PST Recovery Tool displays deleted items (emails, contacts, calendars, tasks, notes, journals) in Red Color in the preview panel, so it will be easy for you to identify the recovered deleted items from a PST file.
Step 9
In the Left Hand side, The software provide Sort option to view Outlook PST / BAK data in according to Item base.
Hit on "Mail" tab to view only email messages. Even in the Emails previewing tab, software provides metadata based sort (say: emails with attachments, To, From, Subject, Sent date, Received Date, Size etc.).
Step 10
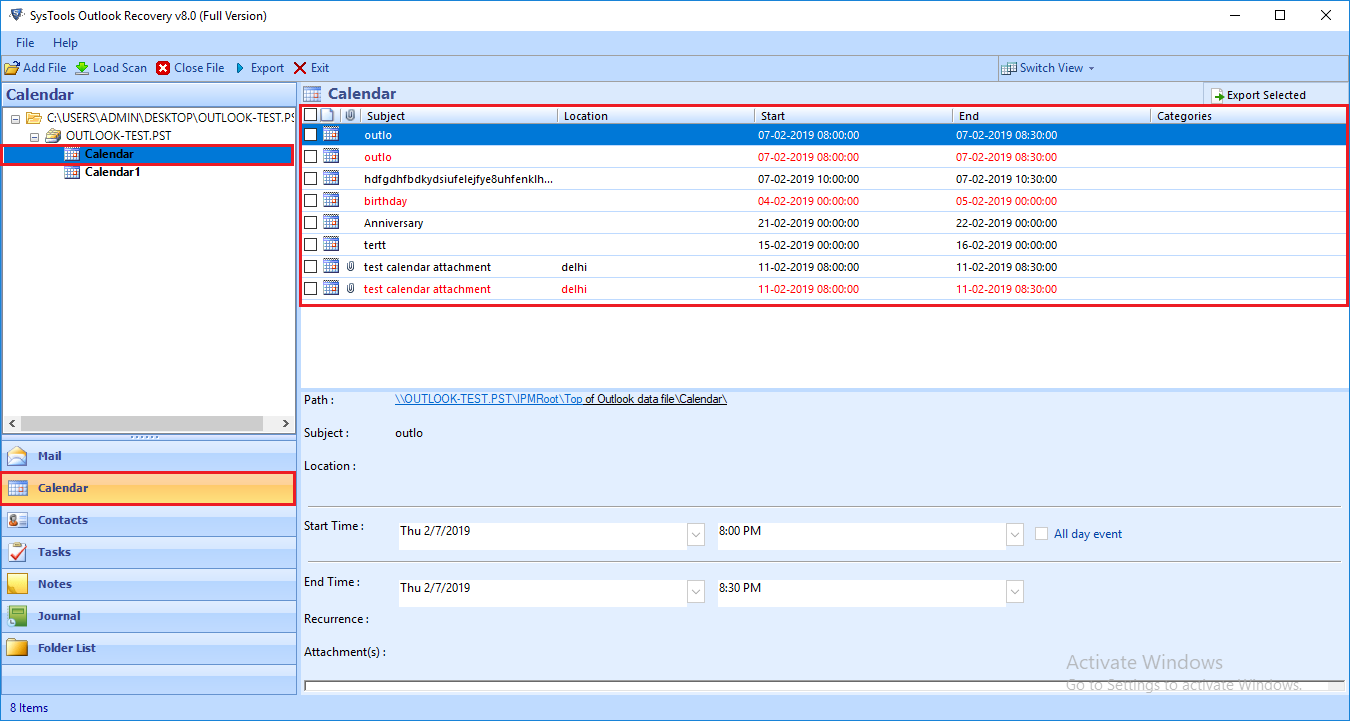
Hit on "Calendar" tab to view Calendars only. The preview panel display respective data in it along with recovered deleted items. (red color)
Step 11
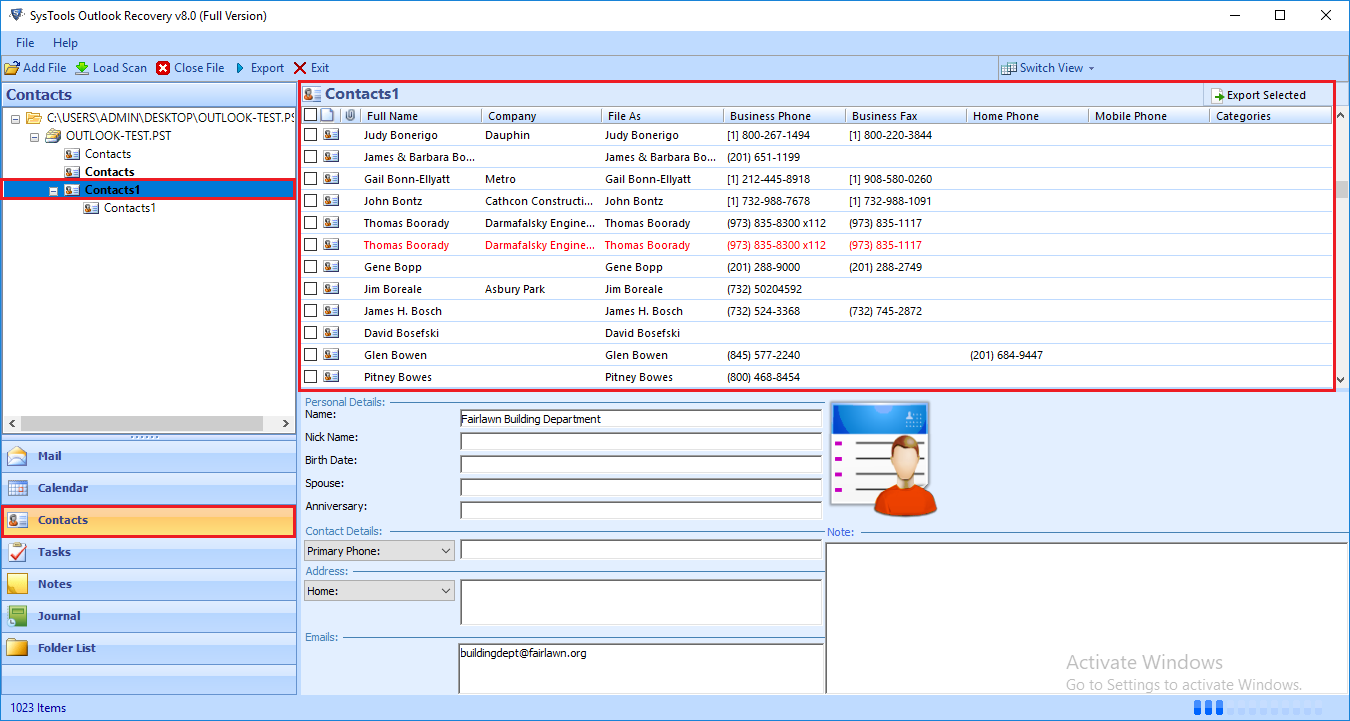
Hit on "Contacts" tab to view contacts only. The preview panel display respective data in it along with recovered deleted items.
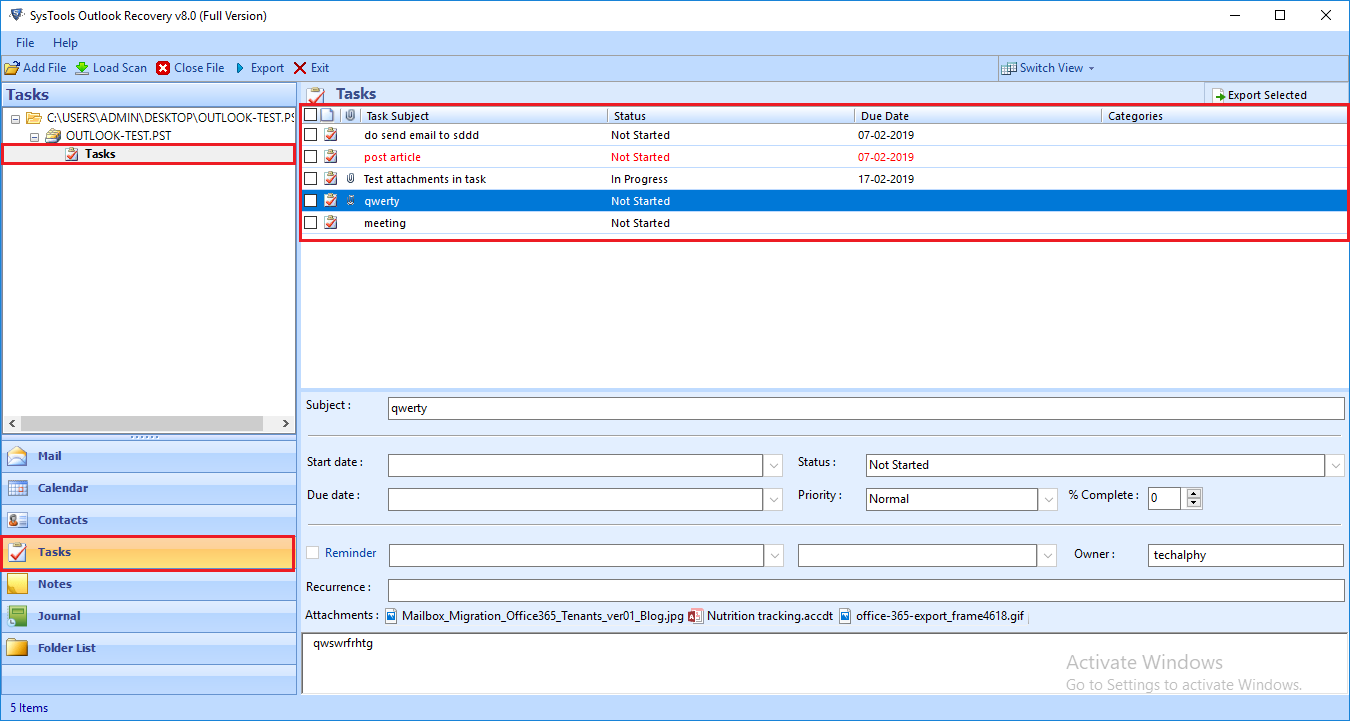
Hit on "Tasks" tab to view tasks only. The preview panel display respective data in it along with recovered deleted items.
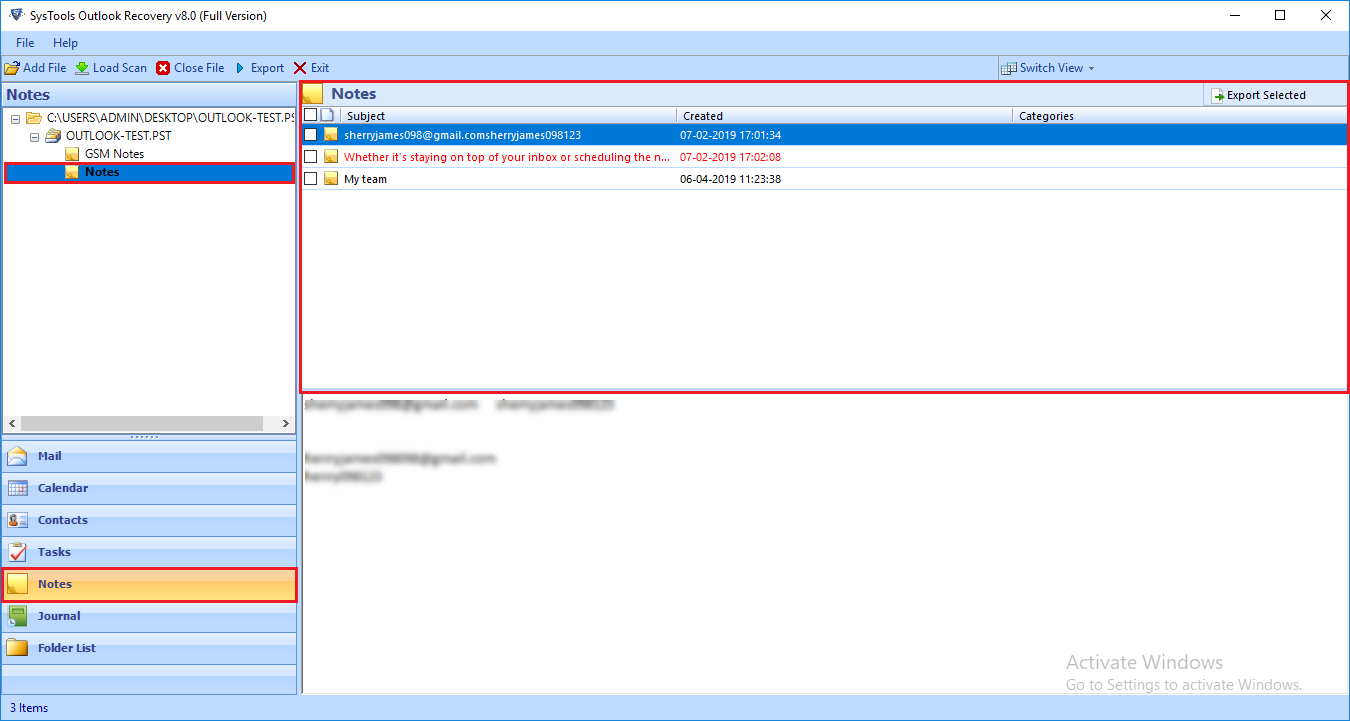
Hit on "Notes" tab to view notes only. The preview panel display respective data in it along with recovered deleted items.
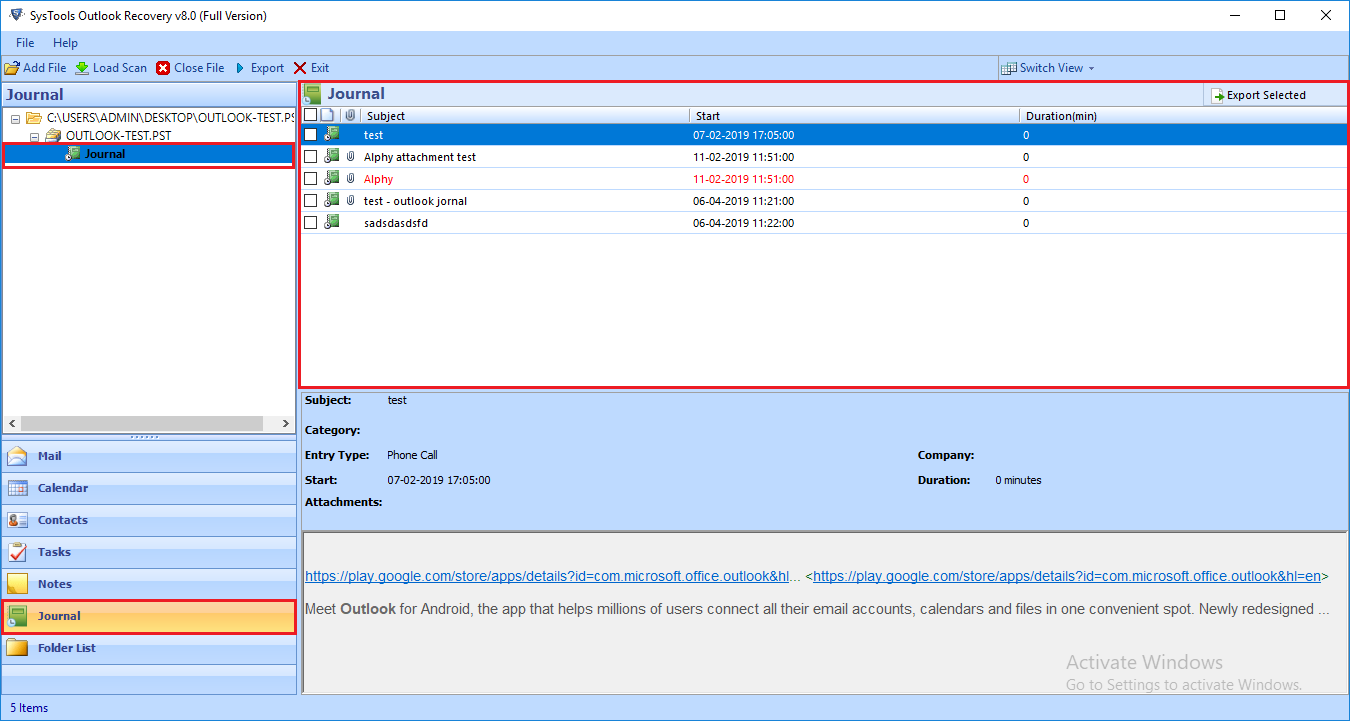
Hit on "Journals" tab to view journals only. The preview panel display respective data in it along with recovered deleted items.
Step 12
Click on "Export" button in the top Left Menu Bar to save entire data items from PST / BAK file.
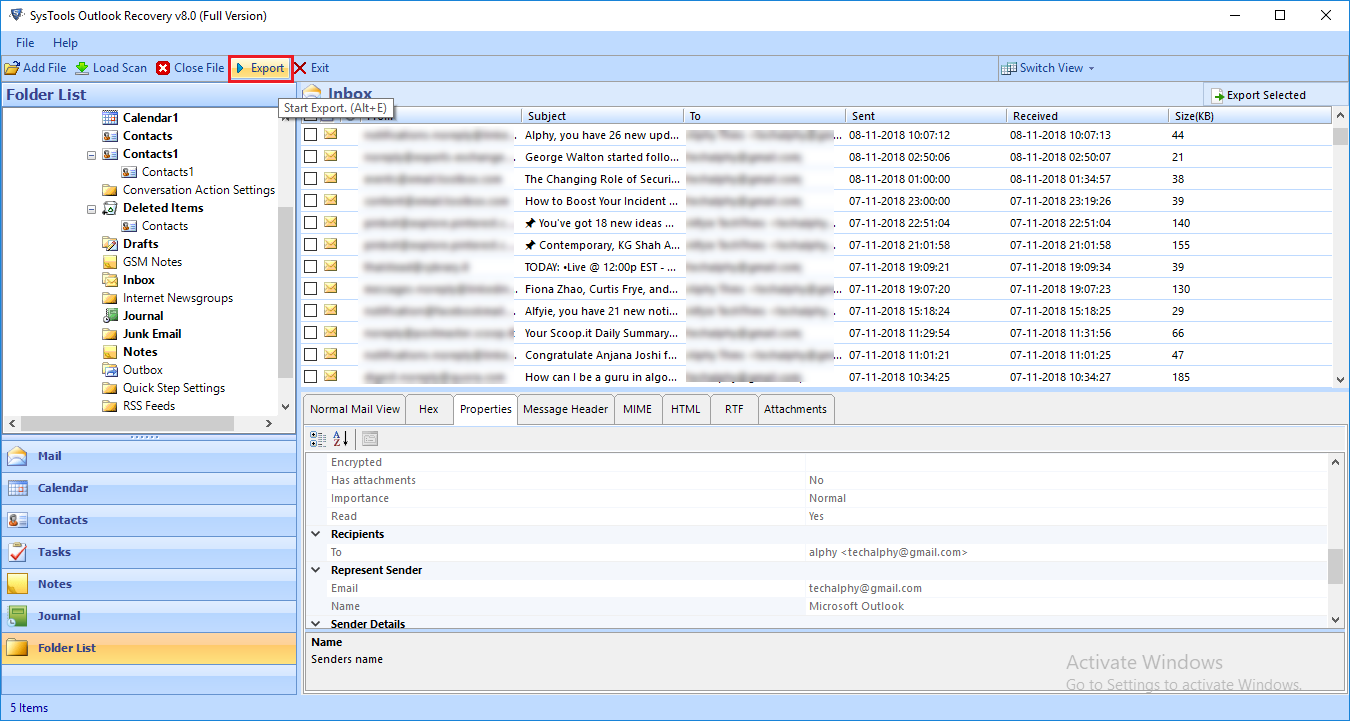
You can also click on Export Selected option to restore or save only few selected items as per user requirement. Check the required ietms from the preview panel and then click on the option.

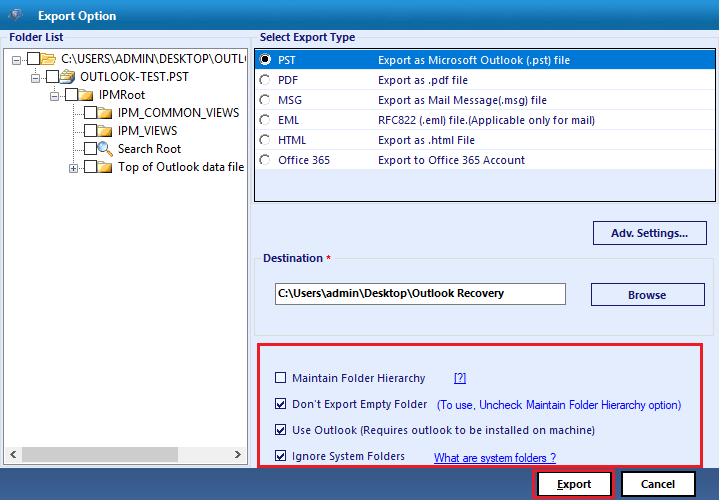
Step 13
Software provides you 6 option to export recovered Outlook PST/ BAK file data items. PST / PDF / MSG / EML / HTML / Office 365
For Example, you have selected PST file format as Export option. Click on Adv. Settings... option
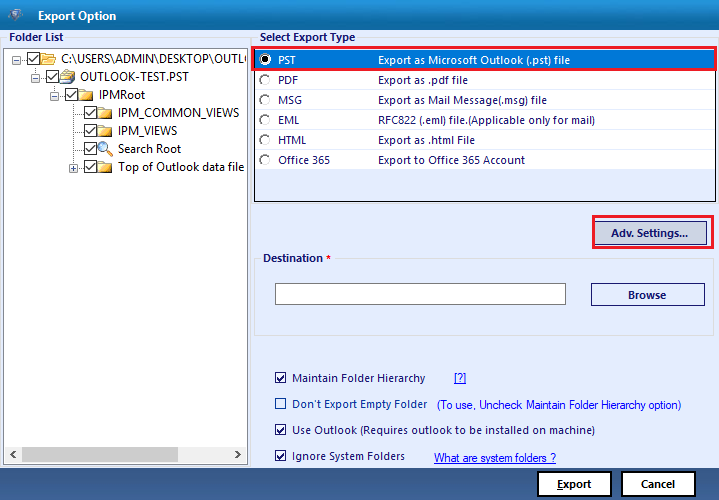
Similarly all file formats have its Advance settings options. And those settings option may vary according with each file format you select.
- For PDF:General Settings option with naming convention, Categories, Date Filter, Include Message Header option. and other Page Layout options, Bates Number options.
- For EMl/ MSG/ HTML: Adv. settings... option comes Naming Convention, Date Filter, Categories options.
- For Office 365: Provides General settings option as required for O365 Import, and other Office 365 settings.
Step 14
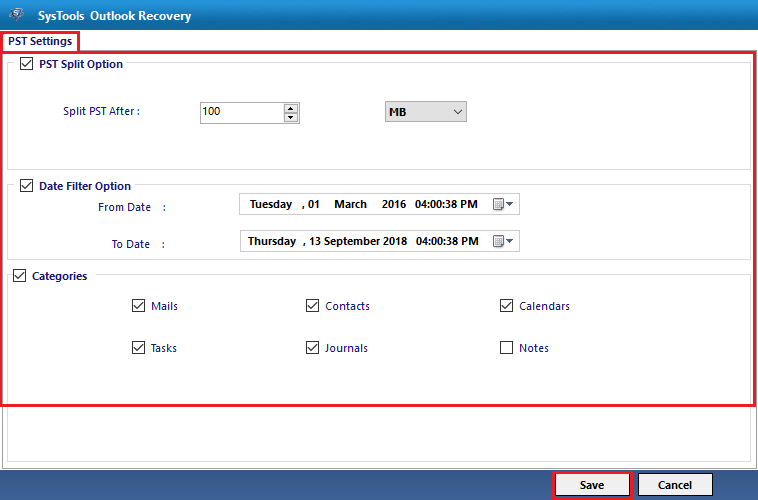
Using PST Split option, user can break large PST file by size. Apply Date filter option to sort out emails of particular time interval.
Step 15
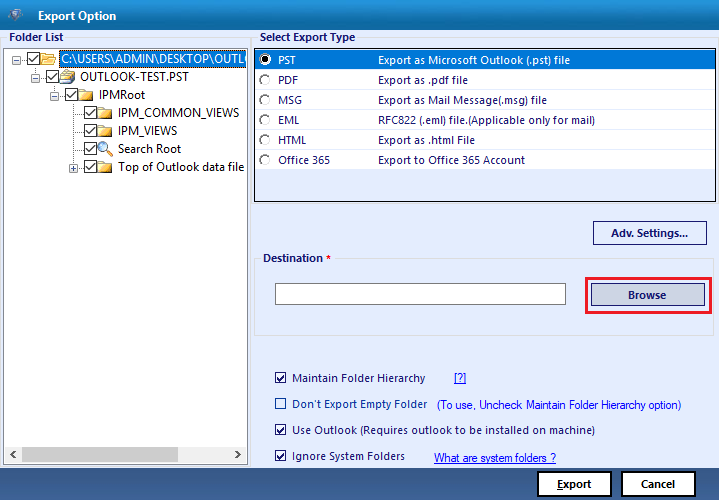
Click on "Browse" button to select destination.
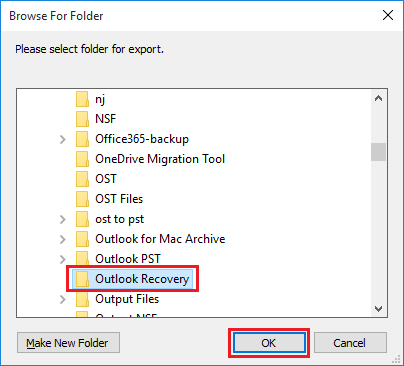
Step 16
Select "Destination" folder.
Step 17
The Path of the file selected location will be displayed in the corresponding textbox.
Also software provides option to Maintain Folder Hierarchy and Exclude Empty Folder options (Note: One at time is applicable)
After selecting the destination folder, click on "Export" button.
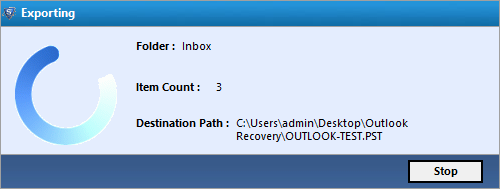
Step 18
You can view the Export Process progress.
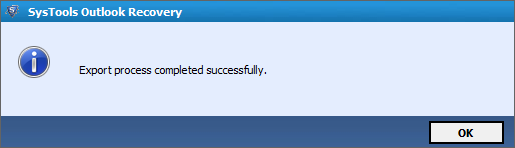
Export procces successfully done.
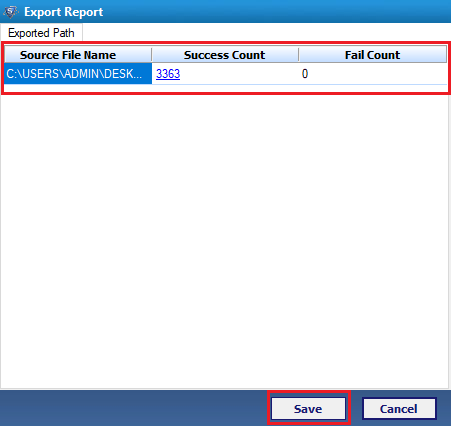
Step 19
You will get a Export report of the proces. It will display the Success and fail count in the process. And you can save it in CSV file format in a required location.
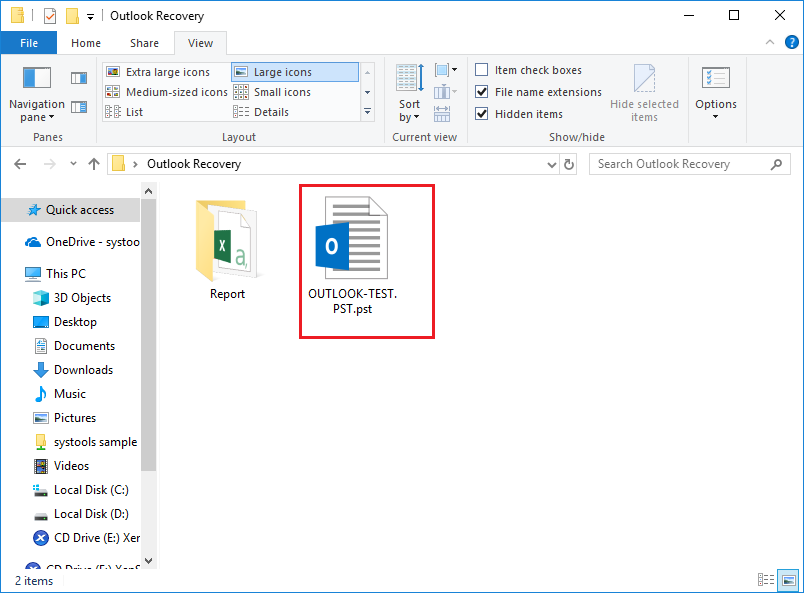
Step 20
View the Resultant PST file generated in the destination location as selected.
Also see the data in Outlook account, after importing recovered Data items in Resultant Output PST file.